

Implementing Cloudflare Zero Trust to Defend Against OSINT Leaks

Overview

Although I was using Cloudflare Proxy, there was an issue where the Origin IP and port information were exposed to OSINT (Open Source Intelligence) search engines such as Censys and Shodan.

After identifying the cause, I blocked direct access to the Origin, made management ports private, and even configured ZTNA based on Cloudflare Tunnel.

Problem Analysis

Although the service was running through Cloudflare, the Origin IP, rather than the Proxy IP, was identified in OSINT search engines.

Root Cause Analysis

The reasons for the server's IP exposure were as follows:

  • TLS certificate exposure
  • Scanners like Censys continuously scan public IPs on the internet.
  • When directly connecting to port 443 of the Origin IP, Nginx was returning the actual service certificate.
  • The IP and domain could be correlated through the SAN (Subject Alternative Name) of the certificate, etc.
  • Inadequate inbound firewall policy (firewall settings for ports 80 and 443 were not configured, allowing access that bypassed the proxy)

Nginx Security Hardening

Configure Nginx not to unnecessarily return the actual certificate upon direct IP-based access.

SSL Handshake Rejection Configuration

ssl_reject_handshake is supported in Nginx 1.19.4 and later.

First, check the version.

bash
nginx -v

File: /etc/nginx/sites-available/default

nginx
server {
    listen 443 ssl default_server;
    server_name _;

    ssl_reject_handshake on;
}
bash
sudo nginx -t
sudo systemctl reload nginx

This setting is used to reject TLS handshakes coming into the default server.

If an attacker specifies the actual domain as the SNI, the legitimate server block can be selected, so this alone cannot block Origin access.

Firewall Policy Changes

Automatically update the inbound access list in preparation for changes to Cloudflare IP ranges.

File: cloudflare_ip_update.sh

bash
#!/usr/bin/env bash

set -Eeuo pipefail
umask 077

readonly TABLE="cf_origin"
readonly IPV4_SET="cf_ipv4"
readonly IPV6_SET="cf_ipv6"

readonly CLOUDFLARE_IPV4_URL="https://www.cloudflare.com/ips-v4"
readonly CLOUDFLARE_IPV6_URL="https://www.cloudflare.com/ips-v6"

readonly LOCK_FILE="/run/cloudflare_nft_update.lock"

log() {
    printf '[%s] %s\n' "$(date '+%Y-%m-%d %H:%M:%S')" "$*"
}

error() {
    printf 'Error: %s\n' "$*" >&2
}

if [[ $EUID -ne 0 ]]; then
    error "Run as root."
    exit 1
fi

for cmd in curl nft python3 flock paste mktemp; do
    if ! command -v "$cmd" >/dev/null 2>&1; then
        error "$cmd is required."
        exit 1
    fi
done

exec 200>"$LOCK_FILE"

if ! flock -n 200; then
    error "Another update process is already running."
    exit 1
fi

WORK_DIR="$(mktemp -d)"
IPV4_RAW="$WORK_DIR/ips-v4.raw"
IPV6_RAW="$WORK_DIR/ips-v6.raw"
IPV4_FILE="$WORK_DIR/ips-v4"
IPV6_FILE="$WORK_DIR/ips-v6"
NFT_FILE="$WORK_DIR/cloudflare.nft"

cleanup() {
    rm -rf "$WORK_DIR"
}

trap cleanup EXIT
trap 'error "Update failed at line $LINENO."' ERR

download() {
    local url="$1"
    local output="$2"

    curl \
        --fail \
        --silent \
        --show-error \
        --location \
        --proto '=https' \
        --tlsv1.2 \
        --connect-timeout 10 \
        --max-time 30 \
        --retry 3 \
        --retry-delay 2 \
        --retry-connrefused \
        --output "$output" \
        "$url"
}

log "Downloading Cloudflare IP ranges..."

download "$CLOUDFLARE_IPV4_URL" "$IPV4_RAW"
download "$CLOUDFLARE_IPV6_URL" "$IPV6_RAW"

if [[ ! -s "$IPV4_RAW" ]]; then
    error "Cloudflare returned an empty IPv4 list."
    exit 1
fi

if [[ ! -s "$IPV6_RAW" ]]; then
    error "Cloudflare returned an empty IPv6 list."
    exit 1
fi

##
## Validate all downloaded values and rewrite them into a canonical form.
##
## This also prevents arbitrary nftables syntax from being injected through
## the downloaded files.
##
python3 - \
    "$IPV4_RAW" \
    "$IPV6_RAW" \
    "$IPV4_FILE" \
    "$IPV6_FILE" <<'PY'
import ipaddress
import sys

v4_input, v6_input, v4_output, v6_output = sys.argv[1:]


def parse_networks(path, version):
    networks = []

    with open(path, "r", encoding="ascii") as f:
        for line_number, line in enumerate(f, 1):
            value = line.strip()

            if not value:
                continue

            try:
                network = ipaddress.ip_network(value, strict=True)
            except ValueError as exc:
                raise SystemExit(
                    f"{path}:{line_number}: invalid CIDR {value!r}: {exc}"
                )

            if network.version != version:
                raise SystemExit(
                    f"{path}:{line_number}: expected IPv{version}, "
                    f"got IPv{network.version}: {value}"
                )

            networks.append(network)

    if not networks:
        raise SystemExit(f"IPv{version} list is empty")

    #
    # Remove duplicates and produce deterministic output.
    #
    networks = sorted(
        set(networks),
        key=lambda net: (
            int(net.network_address),
            net.prefixlen,
        ),
    )

    return networks


ipv4 = parse_networks(v4_input, 4)
ipv6 = parse_networks(v6_input, 6)

with open(v4_output, "w", encoding="ascii") as f:
    for network in ipv4:
        f.write(f"{network}\n")

with open(v6_output, "w", encoding="ascii") as f:
    for network in ipv6:
        f.write(f"{network}\n")

print(f"Validated {len(ipv4)} IPv4 networks")
print(f"Validated {len(ipv6)} IPv6 networks")
PY

IPV4_ELEMENTS="$(paste -sd, "$IPV4_FILE")"
IPV6_ELEMENTS="$(paste -sd, "$IPV6_FILE")"

##
## Recreate our dedicated table on every run.
##
## Because all commands are passed to nft as one batch, the change is
## committed as a single nftables transaction.
##
if nft list table inet "$TABLE" >/dev/null 2>&1; then
    printf 'delete table inet %s\n' "$TABLE" >> "$NFT_FILE"
fi

cat >> "$NFT_FILE" <<EOF
add table inet $TABLE

add set inet $TABLE $IPV4_SET {
    type ipv4_addr;
    flags interval;
}

add set inet $TABLE $IPV6_SET {
    type ipv6_addr;
    flags interval;
}

add element inet $TABLE $IPV4_SET {
    $IPV4_ELEMENTS
}

add element inet $TABLE $IPV6_SET {
    $IPV6_ELEMENTS
}

add chain inet $TABLE input {
    type filter hook input priority -10;
    policy accept;
}

## Allow localhost health checks / local reverse proxy access.
add rule inet $TABLE input iifname "lo" accept

## HTTP/HTTPS may reach the origin only from Cloudflare.
add rule inet $TABLE input \
    meta nfproto ipv4 \
    tcp dport { 80, 443 } \
    ip saddr @$IPV4_SET \
    accept

add rule inet $TABLE input \
    meta nfproto ipv4 \
    tcp dport { 80, 443 } \
    drop

add rule inet $TABLE input \
    meta nfproto ipv6 \
    tcp dport { 80, 443 } \
    ip6 saddr @$IPV6_SET \
    accept

add rule inet $TABLE input \
    meta nfproto ipv6 \
    tcp dport { 80, 443 } \
    drop
EOF

log "Checking nftables configuration..."

nft -c -f "$NFT_FILE"

log "Applying Cloudflare origin firewall..."

nft -f "$NFT_FILE"

log "Cloudflare origin firewall updated successfully."

echo
nft list table inet "$TABLE"

Since issues may arise where you cannot access the server due to script errors or other unavoidable reasons, it is recommended to manage SSH port 22 directly from the instance management dashboard.

These days, we wash computers, not just characters

@Binci

Replacing the Public IP

Return the existing public IP and get a new ephemeral IP allocated.

Regenerating SSH Host Keys

This is not strictly necessary if there is no actual key leakage, but it was changed to prevent fingerprinting.

bash
sudo rm /etc/ssh/ssh_host_*
sudo dpkg-reconfigure openssh-server
sudo systemctl restart ssh

Zero Trust Network Access

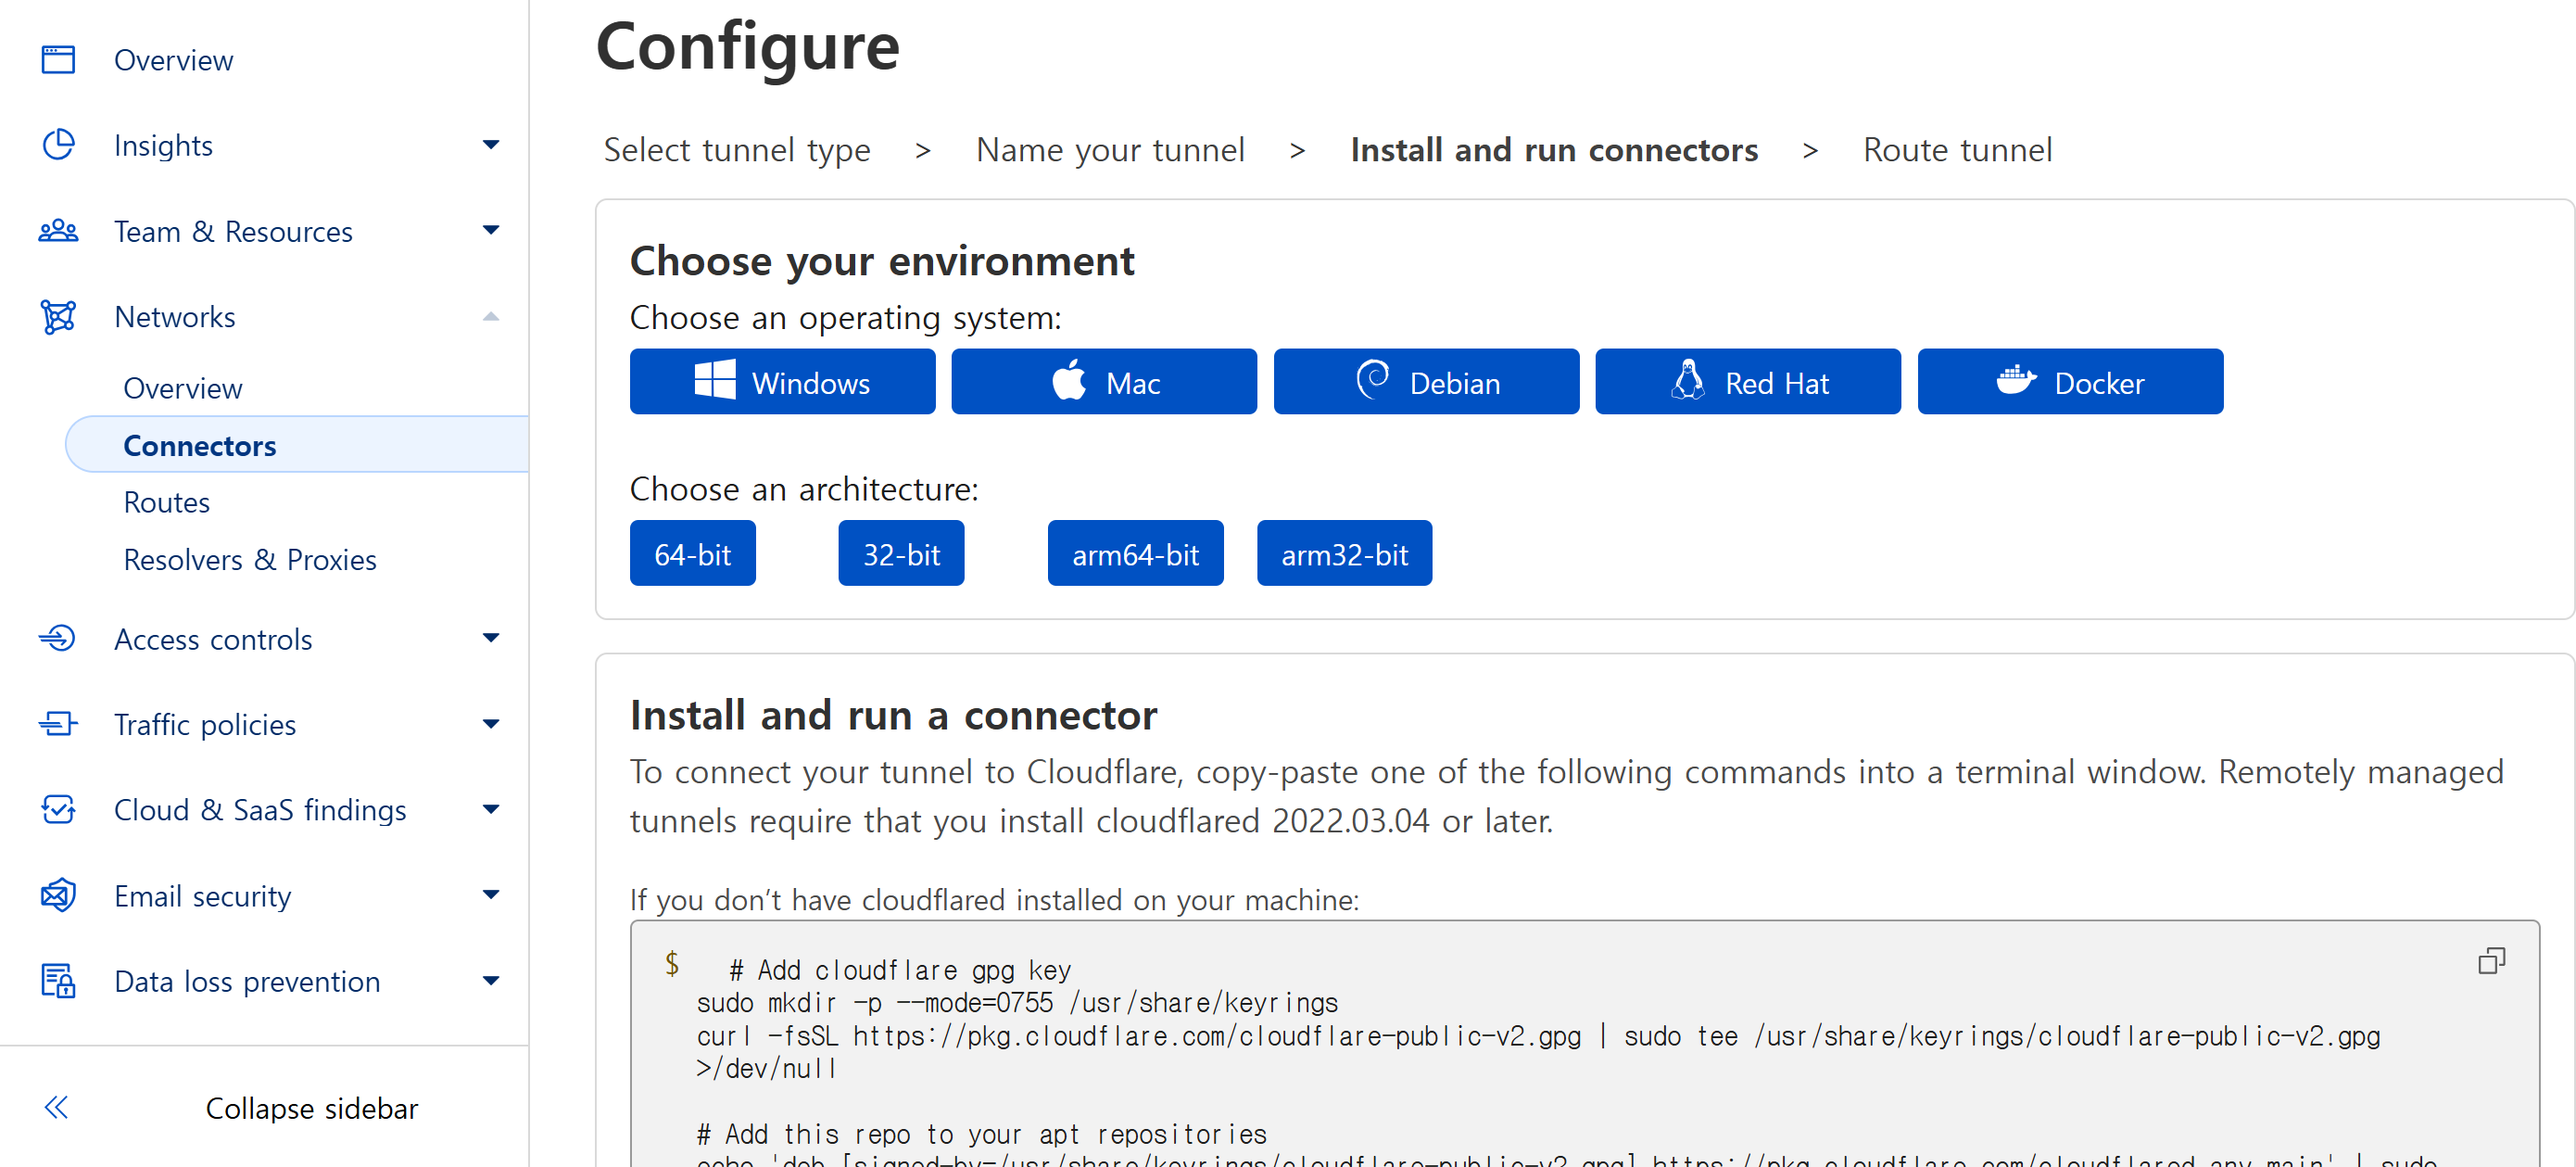
Now, access via Cloudflare Tunnel instead of directly exposing to the public internet.

Installing cloudflared
image

Create a tunnel in the Cloudflare One Dashboard and obtain a token.

bash
sudo cloudflared service install <YOUR_TOKEN>

Check after installation.

bash
sudo systemctl status cloudflared

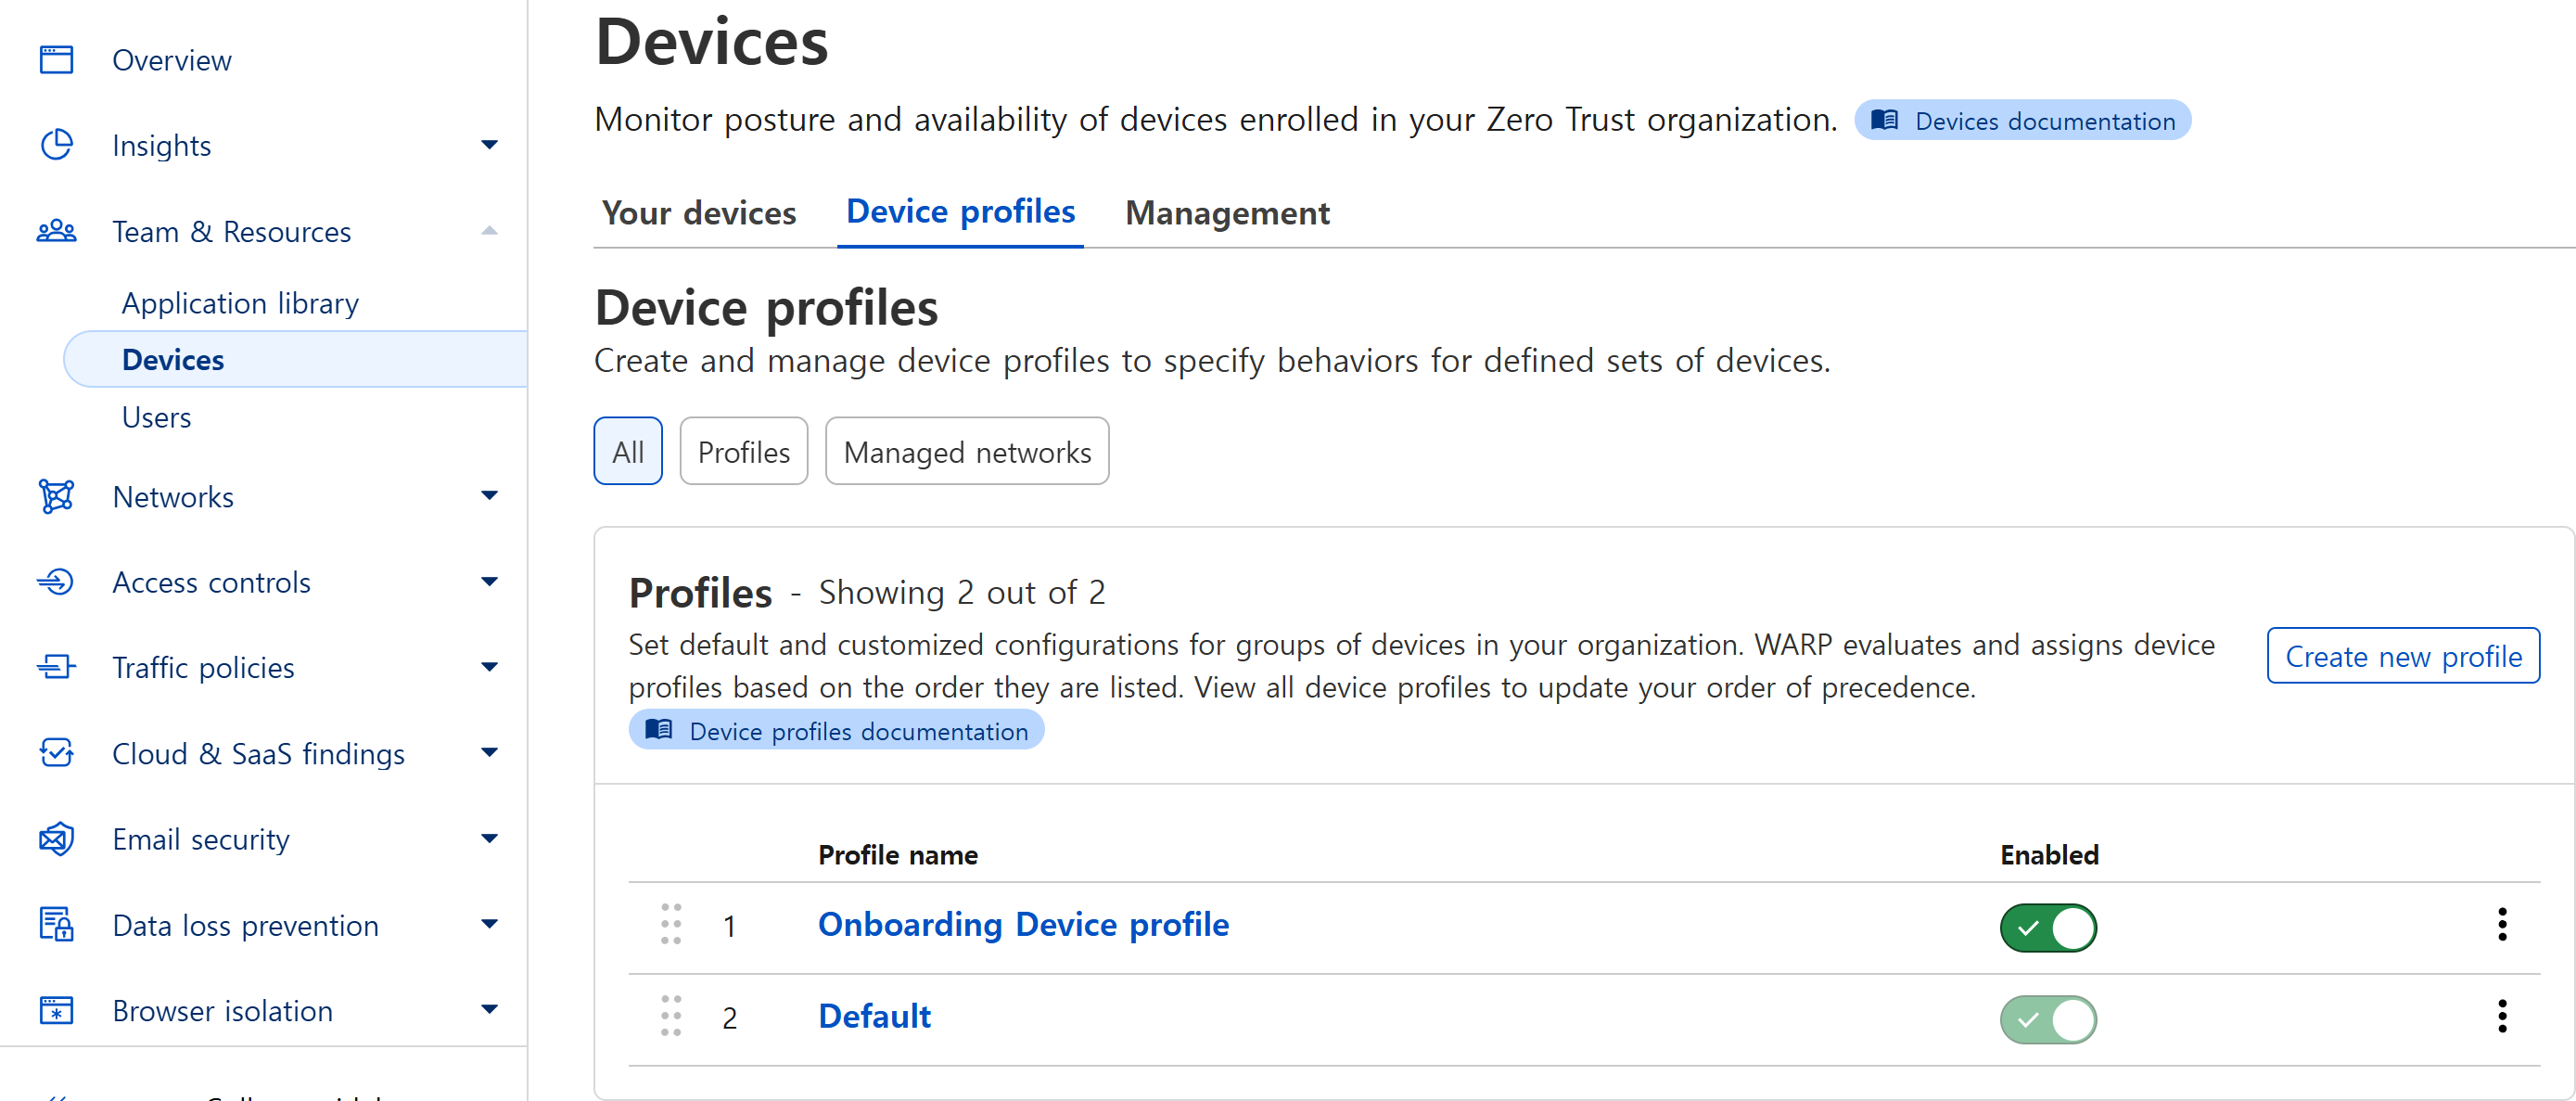
Configuring Split Tunnels and Private Networks
image

First, check the server's IP.

bash
hostname -I

Example:

text
123.xxx.xxx.xxx 10.0.12.34

The private IPv4 ranges are as follows:

Private IP Ranges

  • 10.0.0.0/8
  • 172.16.0.0/12
  • 192.168.0.0/16

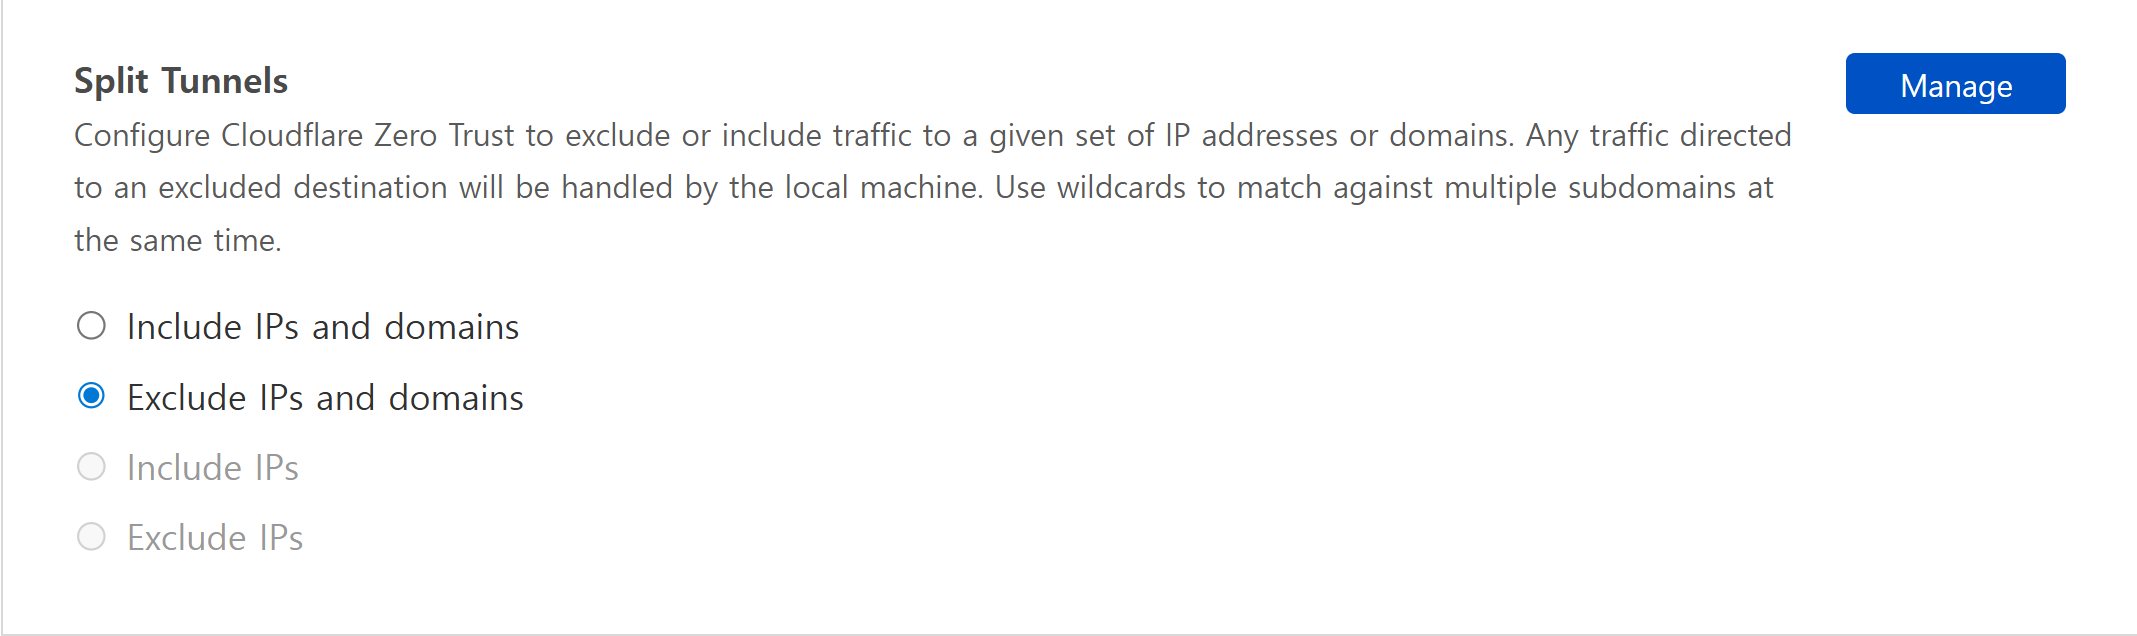
Team & Resources/Devices > Devices > Device profiles > Profile > Split Tunnels
image

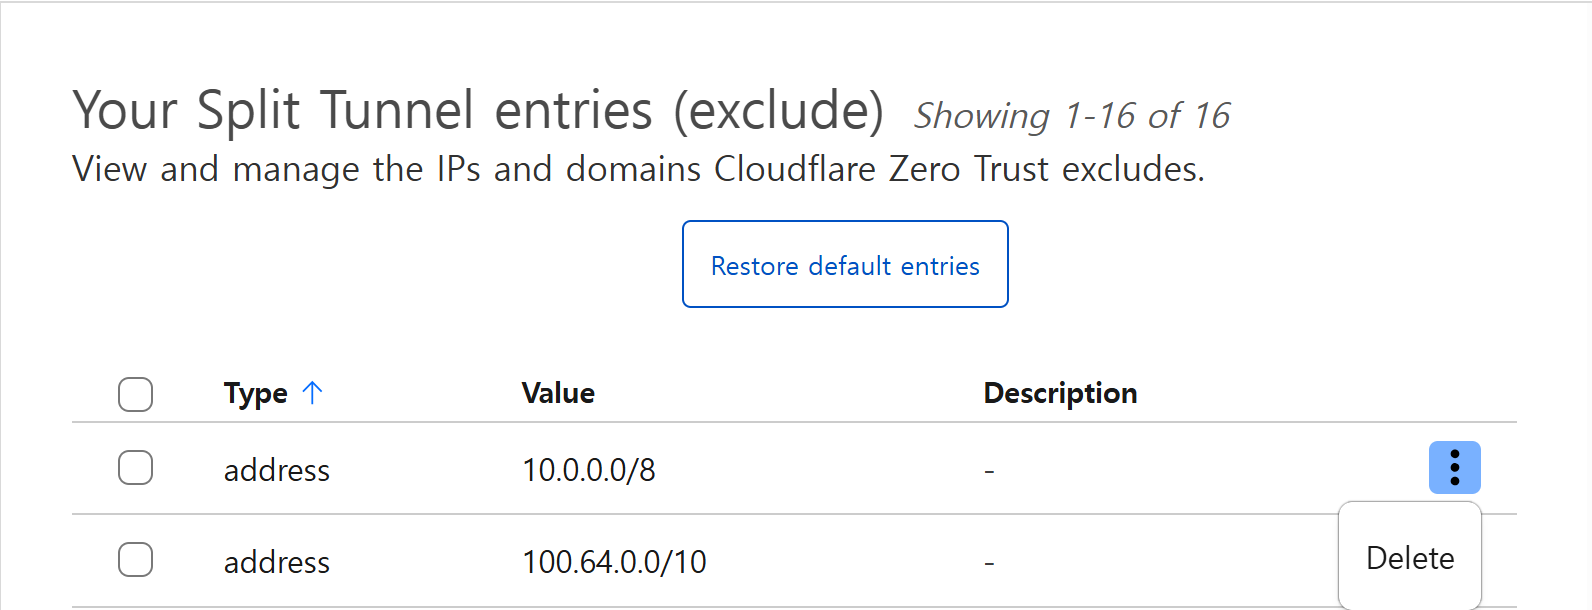
If the private network range you want to access is included in Exclude, adjust the range.
image

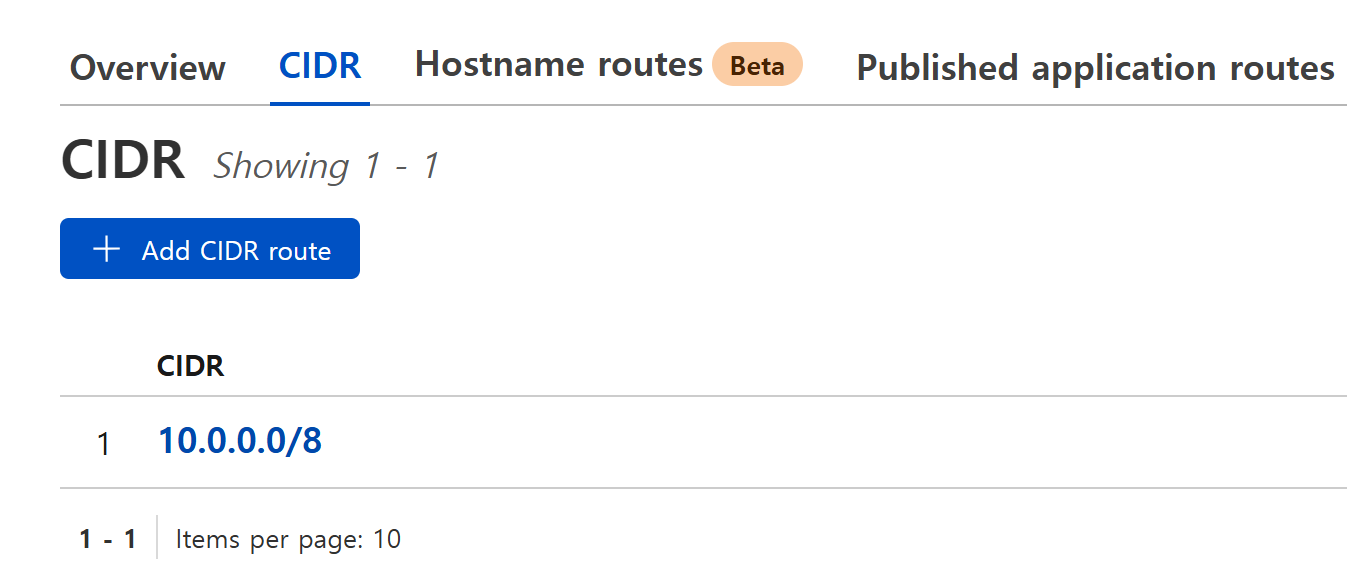
Networks/Routes > Routes > CIDR Routes

Add the private network.
image

Access

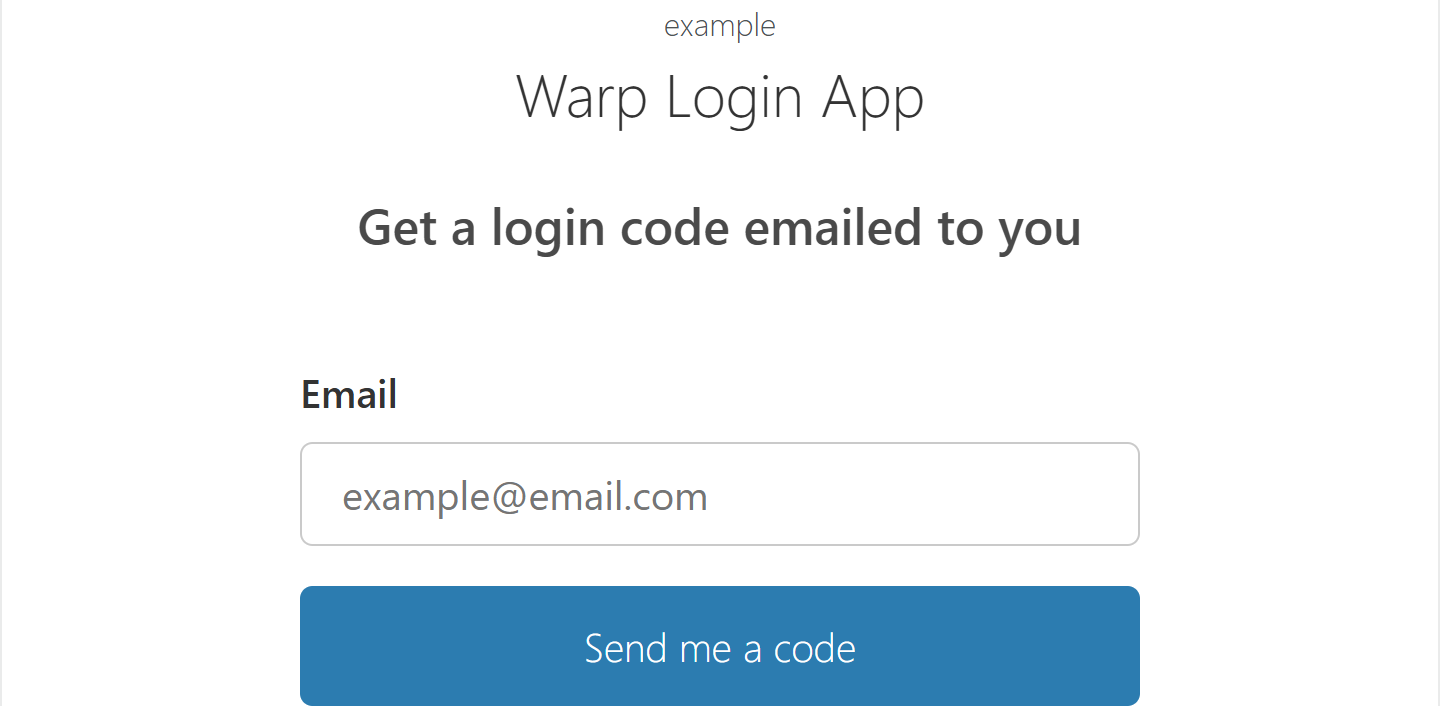
After installing the Cloudflare One Agent (WARP Client), log in to the team domain used during configuration.
image